
I was in the mood for a fun solo, and the North Ridge of Mt. Conness fit the bill. The climb is 5.easy with an exposed rappel in the middle of the route. It was looking to be an awesome, exciting day.
I gathered some beta on the climb: Details about the rappel, rock quality, and difficulty. Looking at a topographic map, the approach and the descent seemed straightforward. So, I figured I’d wing it. I would aim for the col between Mt. Conness and North Peak, and then descend via one of Conness’s east ridges — which I assumed to be a scree-ski.
The stats for the route are roughly 10 miles and 3,000 feet of gain. Given that the vertical scrambling and climbing are about 1,000 vertical feet, I planned for it to take half a day. So, I packed a handful of granola bars for my food and called it good.
In terms of climbing equipment, I brought a lightweight 60m half-rope for the rappel. I also tossed in some tat, rap rings, and a few bits of pro in case I’d have to build anchors. I thought long about whether to bring rock shoes or not, but in the end, I elected to remain in trail runners for the climb.
I slept at the Saddlebag Lake trailhead Friday night. The next morning, I started hiking at 5:00 a.m. There were two other groups of two awake at the same time. One would be doing the North Ridge of Conness as a simul-climb, while another would be doing a link-up of the Northwest Ridge of North Peak, the North Ridge of Conness, and the West Ridge of Conness. For an awesome single-day alpine route on the Fourth of July weekend, two other teams are nothing.
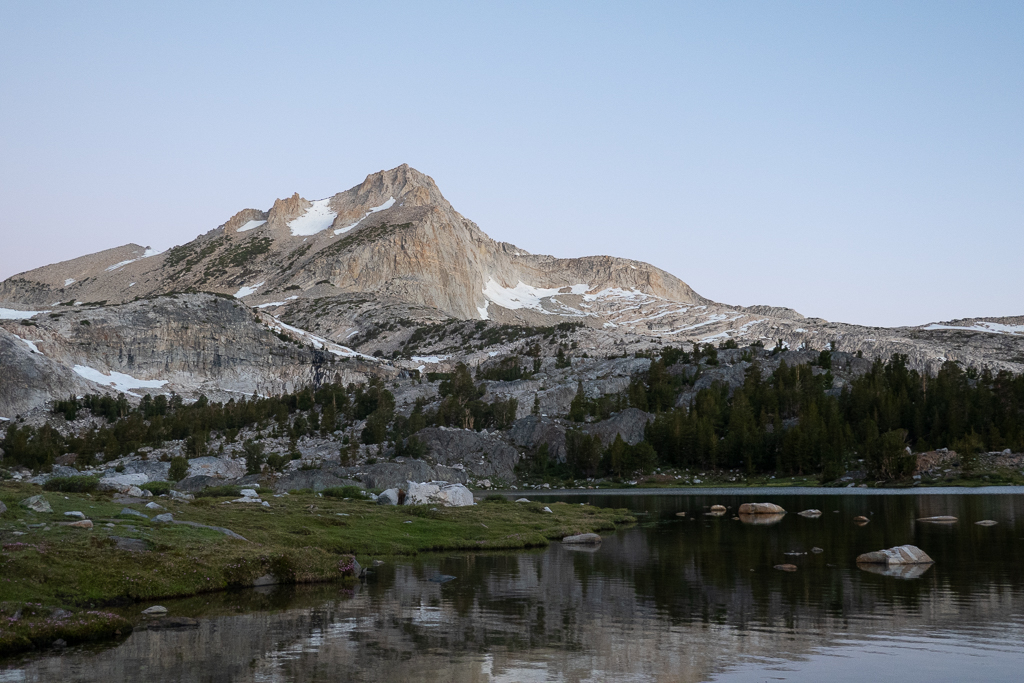
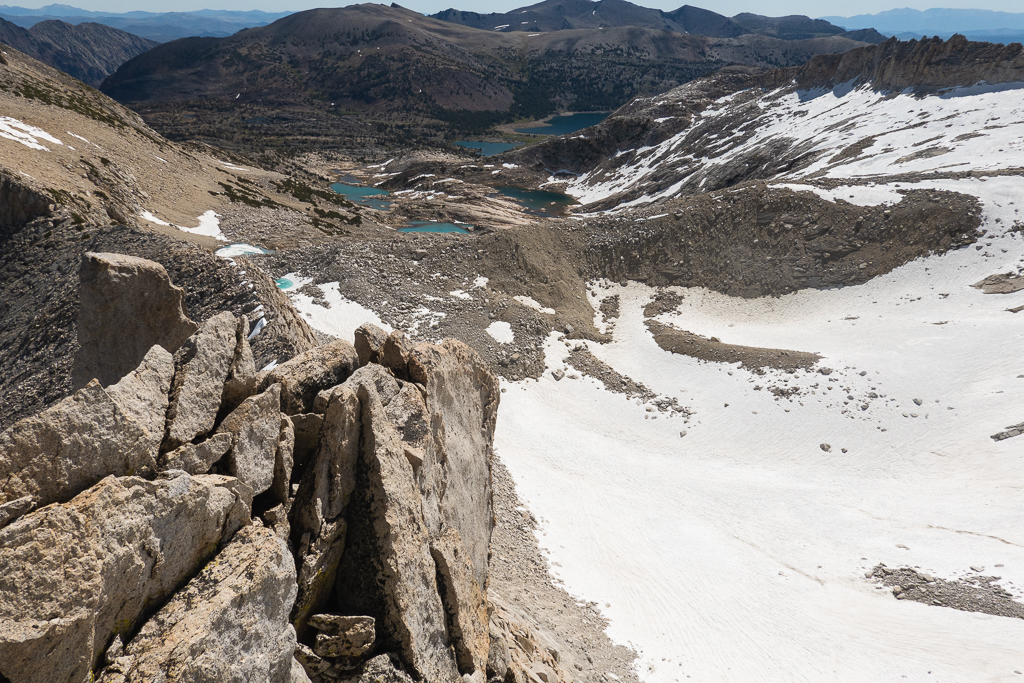
The first mile or two on the west edge of Saddlebag Lake is on a flat, easy trail. It passed by quickly. From there, a use trail goes into the Conness Lakes Basin. It’s easy to follow, but I left the trail a few times straying too high. Note of advice — stay right on the south shore of the first lake, and the north shores of the subsequent lakes. No need to traverse high, just follow the topography up the drainage.
This lake basin in and of itself would be a worthy hike, with no people. It’s that gorgeous and close to the road.
I filtered some water at one of the first lakes and drank a liter to “camel up” for the climb. I go through a lot of water, so this strategy does me well. It lets me carry less water on my back.
Further on the route, while I was rummaging around my pack to grab sunglasses, I dropped my water and filter somewhere.
When I realized I lost a liter of water and my filter, I spent 20 minutes wandering the basin searching for it. A team climbing the North Ridge caught up with me and asked what was up. I told them, and they offered to let me use their filter. Thankful, I drank another half-liter and filled my one-liter Nalgene to the brim. A liter would be fine I reckoned. It’s a short climb and an easy descent back.
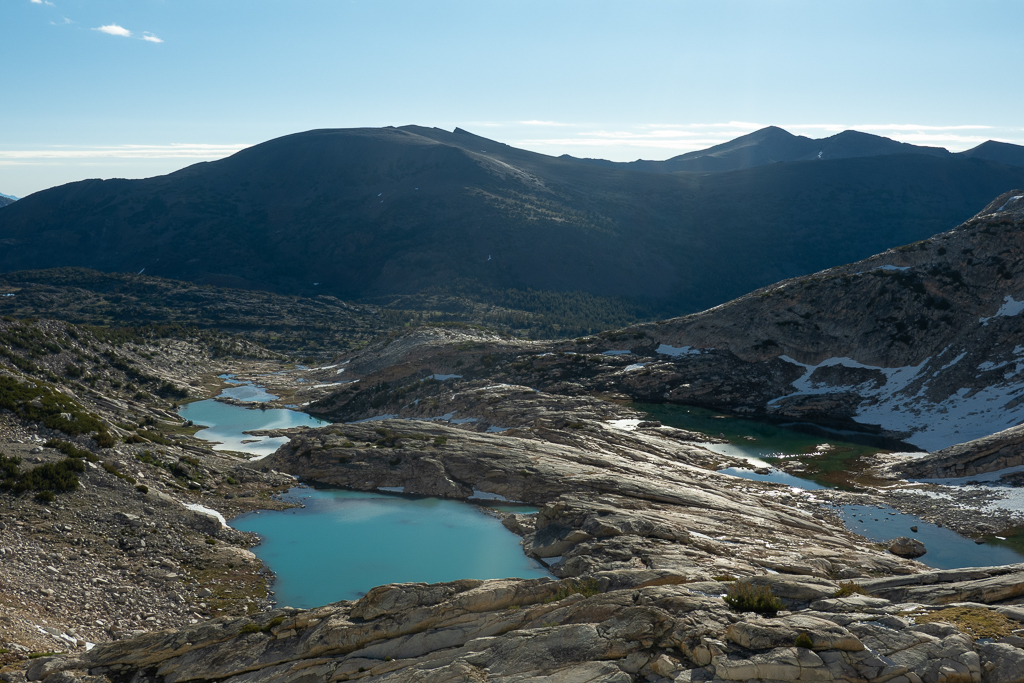
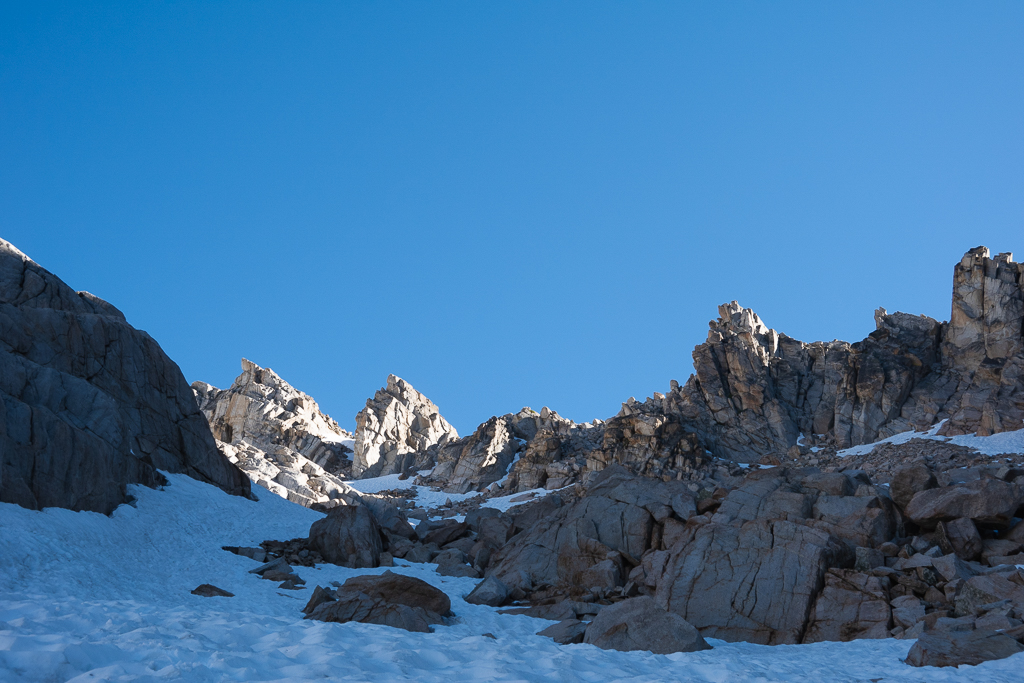
I soon reached the basin immediately beneath the glacier. I aimed for the north edge of the glacier and gained a few hundred feet. As I crossed over a moraine, I saw that the col in the ridge is much longer than I thought. I also saw that climbing from here would necessitate near-vertical climbing on loose, slabby blocks; or on chimneys and off-widths. On-sighting that on solo, definitely not.
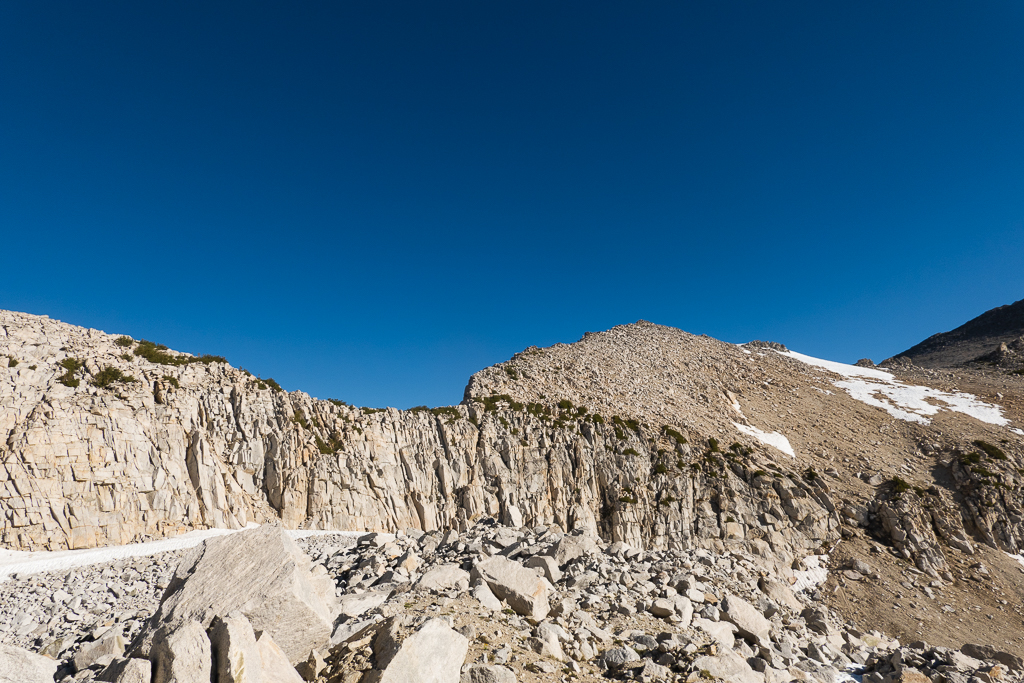
I traversed on one of the moraines. This was slow-going with numerous loose blocks and other unpleasantness. I descended a snowfield to a glacial lake and saw the first viable route to the North Ridge. But, this involved climbing a scree chute atop and between car-sized boulders. It looked like magic alone was holding those boulders on the slope. With rockfall signs as well, I wasn’t going to go up there.
I then traversed back to where I started. I completed a giant, useless circle. I found footsteps accessing the ridge, which first reached the South Ridge of White Mountain 300 feet above the col.
Accessing the ridge was straightforward on the scree, but very annoying. Climb two steps, sink one step back. So on and so forth.
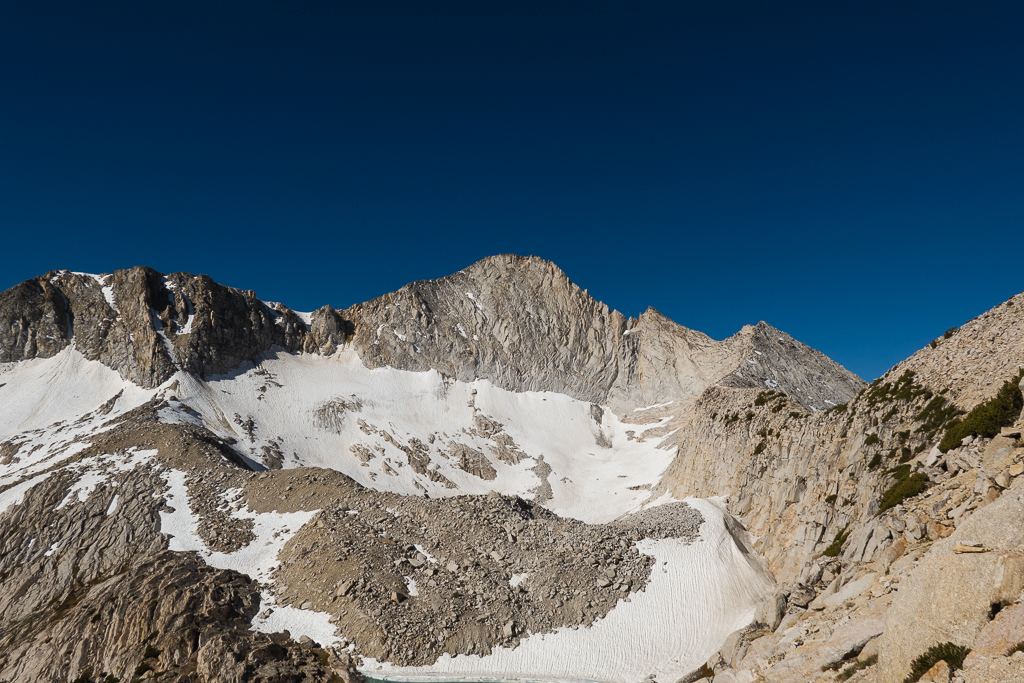
I managed to cut off some gain by traversing. I reached the South Ridge of North Peak at 11,650 feet rather than 11,800 feet. Some easy down-scrambling on the crest brought me to 11,500, and then the North Ridge of Conness began.
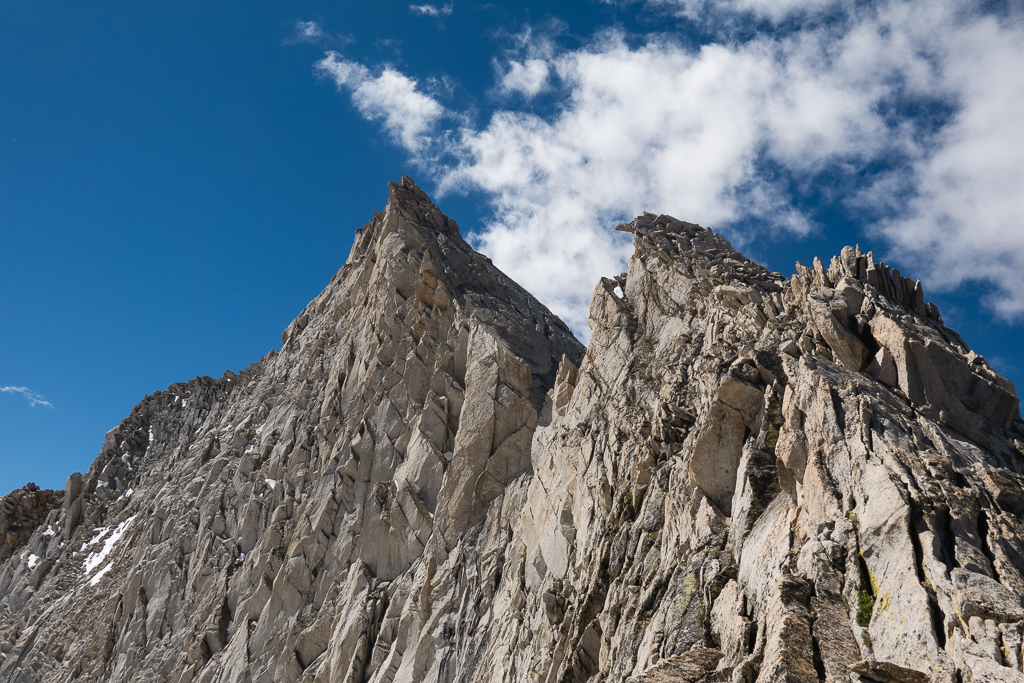
The scrambling is 2nd and 3rd-class along the flat part of the ridge. Once it starts gaining elevation, it becomes spectacular and exposed 4th-class. The glacier is looming beneath you the entire time.
The first bump in the ridge is easier than it looks. It’s accessed by exposed 4th-class moves. Then, a little bit of 3rd-class down-climbing returned me back to ascending.
Then, the first tower loomed in the way. Approaching it is 4th-class with perhaps a few 5th-class moves thrown in. Even so, there are hand-holds and foot-holds everywhere.

Instead of climbing to the top of the first tower, I crossed 20 or 30 feet beneath it on the west side of the mountain, via a ledge. Towards the end of the ledge, it looks loose and sketchy. I tried to climb around it by exploring nearby chimneys, but they wouldn’t go. I went back to the ledge and found it solid. It wasn’t as loose as it looked, and I returned to the ridge-line.
Now, the second tower loomed in the way. It’s consistently exposed 4th-class to the top. It’s a little less technical than the first tower. The rock is solid, and the climbing was secure.
Soon, I reached the top of the second tower. The exposure was awesome — the ground drops beneath in all directions. There’s a solid rappel anchor too. If down-climbing instead, it’s 5.6 with a little under 1,000 feet to the deck. But, it’s apparently easier than the grade suggests.
The rappel route here traversed among several blocks and other rope-catching formations. It was windy too, and tossing the ropes would lead to a tangle. So, I set up the rappel as normal, then stacked the rope into my backpack. It’s a handy little trick that makes rappelling tangle-free in any direction.
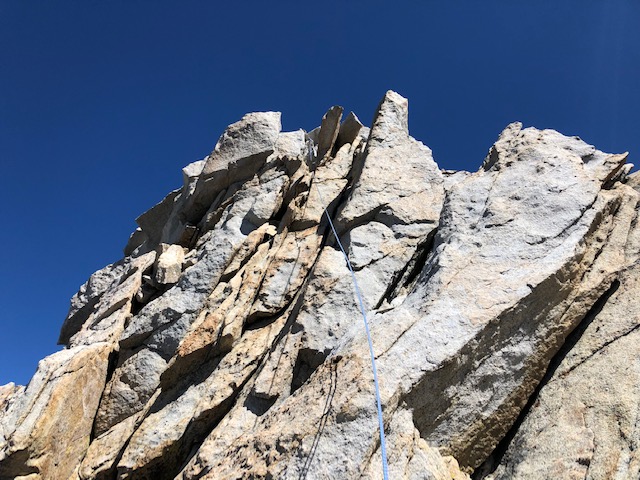
I rappelled, and after maybe 60 feet of rope, I reached the next rappel anchor. This was solid, and from here, the rappel down was a plumb line. I was able to toss the ropes and did another rappel. That was about 70 feet long.
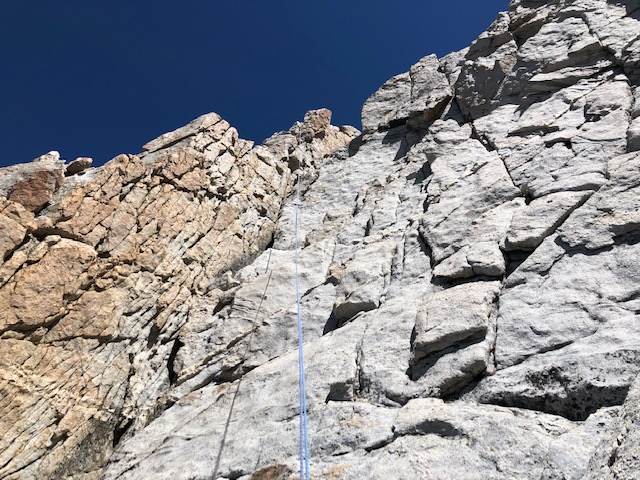
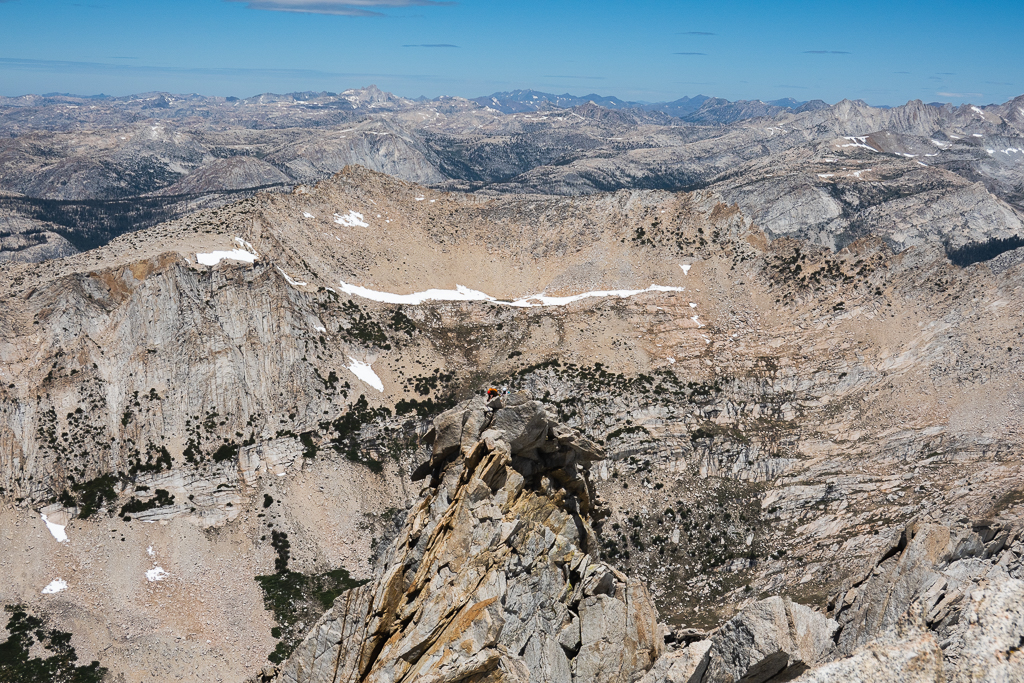
Now, the summit was about 400 vertical feet overhead. The climbing was a little off the ridge crest, and it was slabby. It’s more vertical than it looked to the eye, but it was never sustained 90 or even 80-degrees. It’s a double-fall-line too, and the way up is an upward traverse. If staying close to the ridge-crest, some down-climbs too, as I’d come to find out.
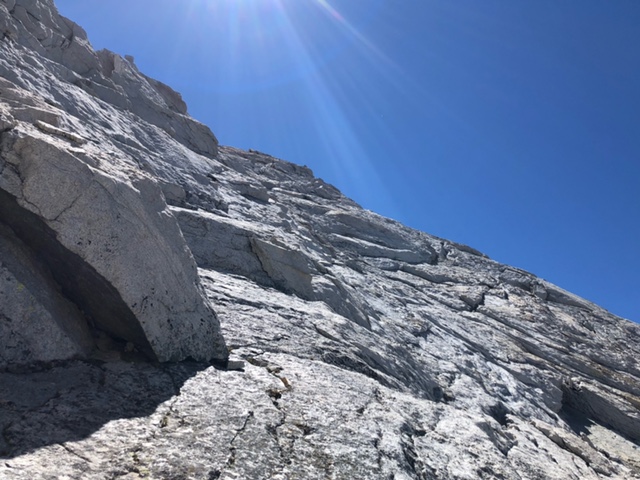
I started climbing up by following cracks and ledges interspersed with slabs. Now, the route was a fun mix of 5.easy and 4th-class. I stayed close to the ridge crest the whole way. That had more features to climb on, and it wasn’t as slabby as further down the face. I also heard this is where the coolest climbing was. It was very fun. My favorite part was a perfect hand-crack I could jam my way up, with fantastic exposure underneath.
The route during the last 150 feet of vertical to the summit is more difficult. I couldn’t find a way up that didn’t involve exposed mid-fifth class climbing, and in some cases, down-climbing. I climbed up one of these routes, and it didn’t go.
At this point I was mentally exhausted from all the concentration required in soloing. I may have picked the wrong day to solo too, and my head was in the wrong space. The icy gusts of wind didn’t help either.
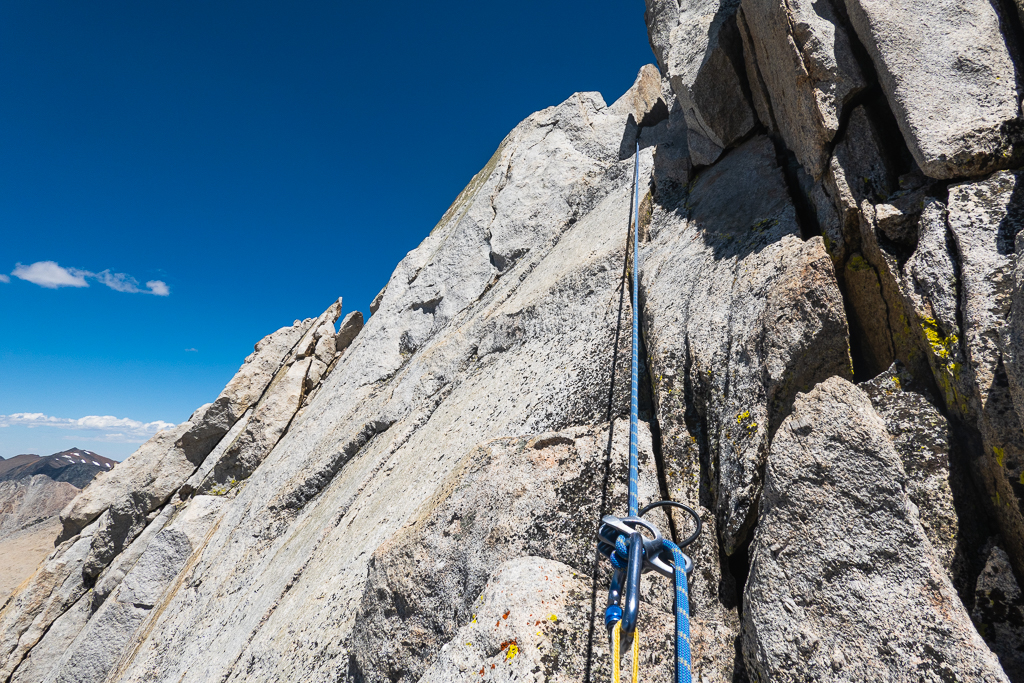
There was easier terrain a downward traverse away. Wanting to keep today’s risk low, I decided to “aid it.” Better safe than sorry, I made an anchor with some cord around a horn. I brought my rope out and rappelled 30 feet past this section, onto better ground.
I continued, and looking for a way up, I saw a route I thought would go. It didn’t go. To my right was a downward traverse across slabs. That was the only way to continue, unless I back-tracked far away. The wind was gusting even more now, and I was not in the mood of pushing it, even if it was easy. The worn trail runners I brought weren’t the best decision either. Note to self: buy a new pair.
So, I built another anchor, with two nuts and a locker. I rapped past these slabs.
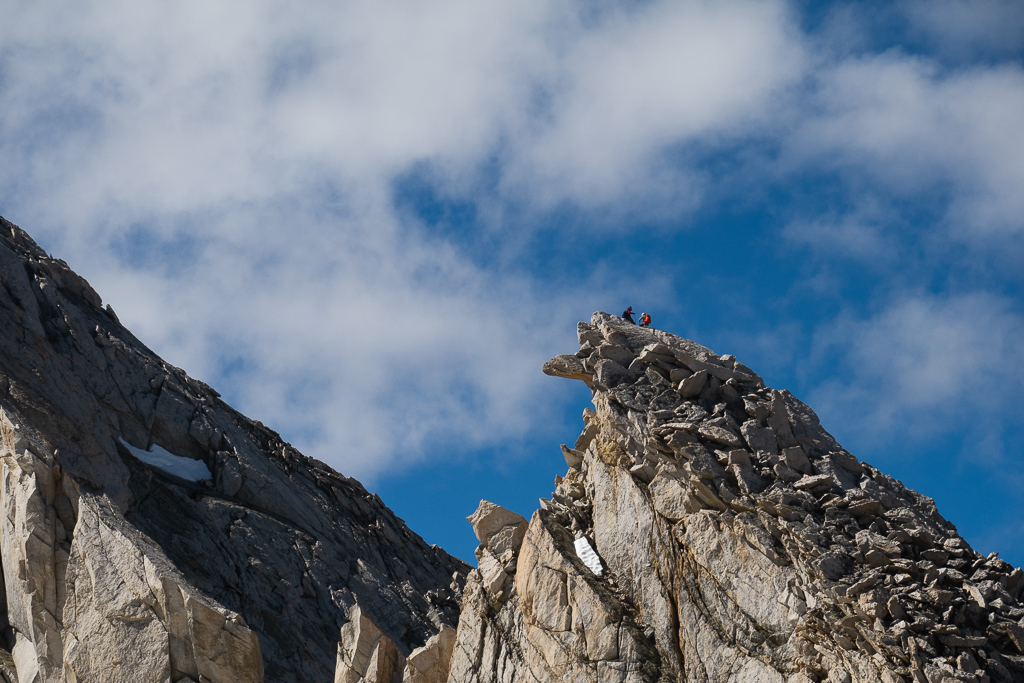
Now, I was a mere stone’s throw away from the summit. The West Ridge was visible, and the party I met in the parking lot the night before was making their way up. The view in that direction was great.
I climbed up a series of ledges, and then a short crack system. I could see the summit and very easy ground just up ahead. But, an exposed down-climbing traverse on polished granite was in the way. It looked like I’d have to back-track a long way to find terrain I’d be willing to solo across. Looking down, I saw that the climb could’ve been a lot easier if I stuck low the entire way, and then met the West Ridge where it becomes 3rd class. But that route would miss out on all the fun.
I brought out the rope once again. I made an anchor with a sling girth-hitched where two several-ton blocks were against each other. I rappelled a 25-foot downward traverse, and found myself on class 2 terrain, right below the summit.
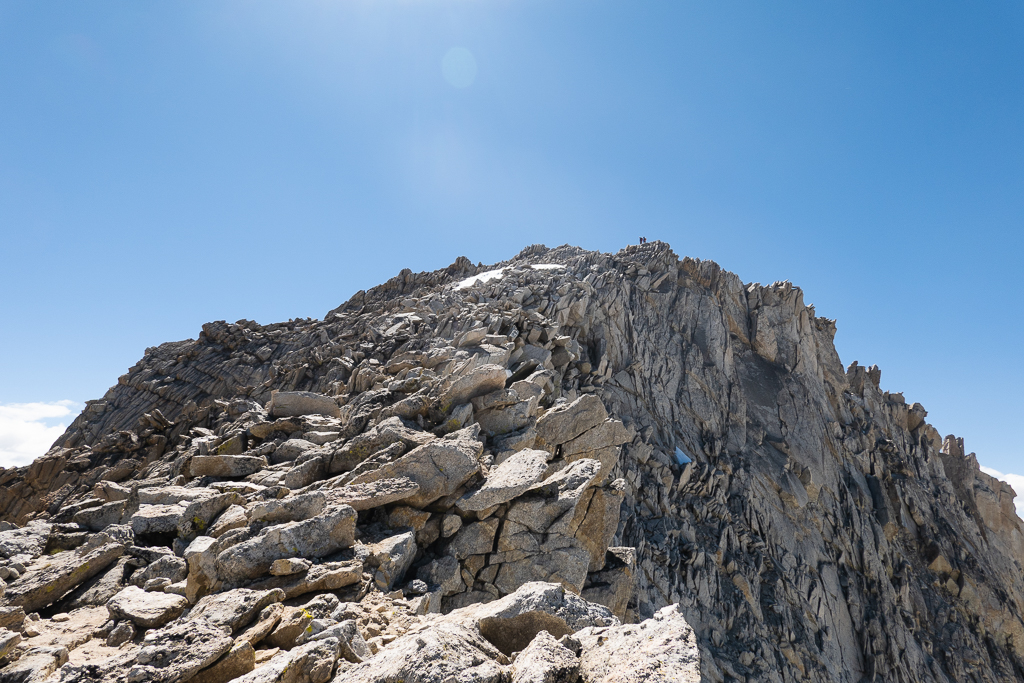
I scrambled up to the summit and took in the view.
I had drank most of my water now. But, I wasn’t concerned. I thought it would be an easy descent back to my truck. I was only 2,500 feet above it after all.
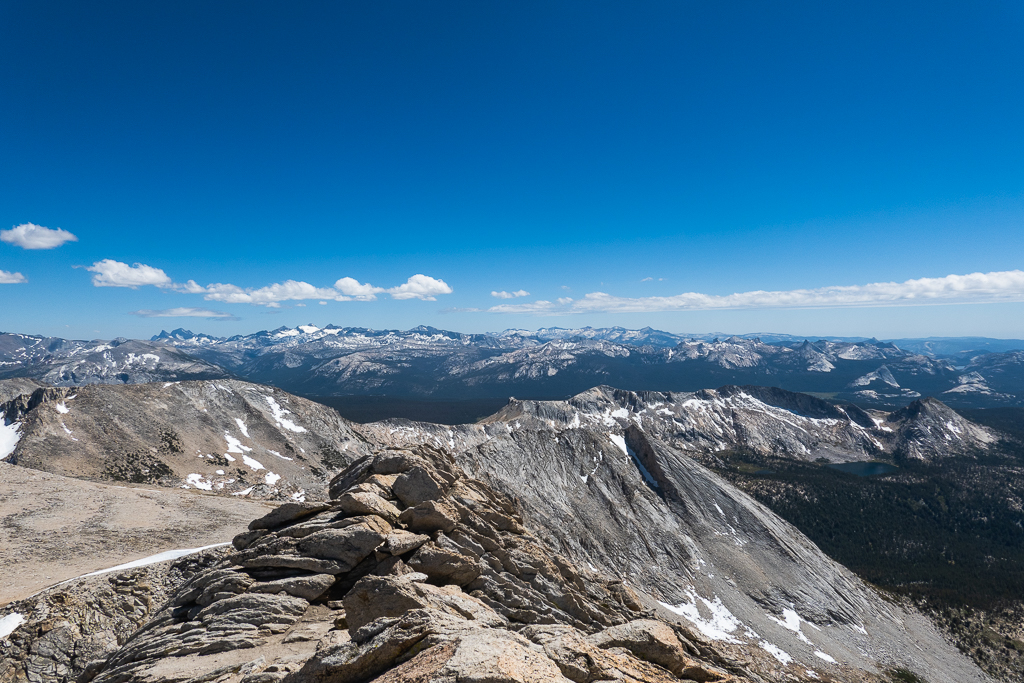
From the summit, the descent on the East Ridge looked like a loose and saw-toothed mess. It was easier than it looked, and about 200 – 300 vertical feet of class 2 and 3 down-scrambling brought me to a broad, sloping plateau. There were a few loose sections though.
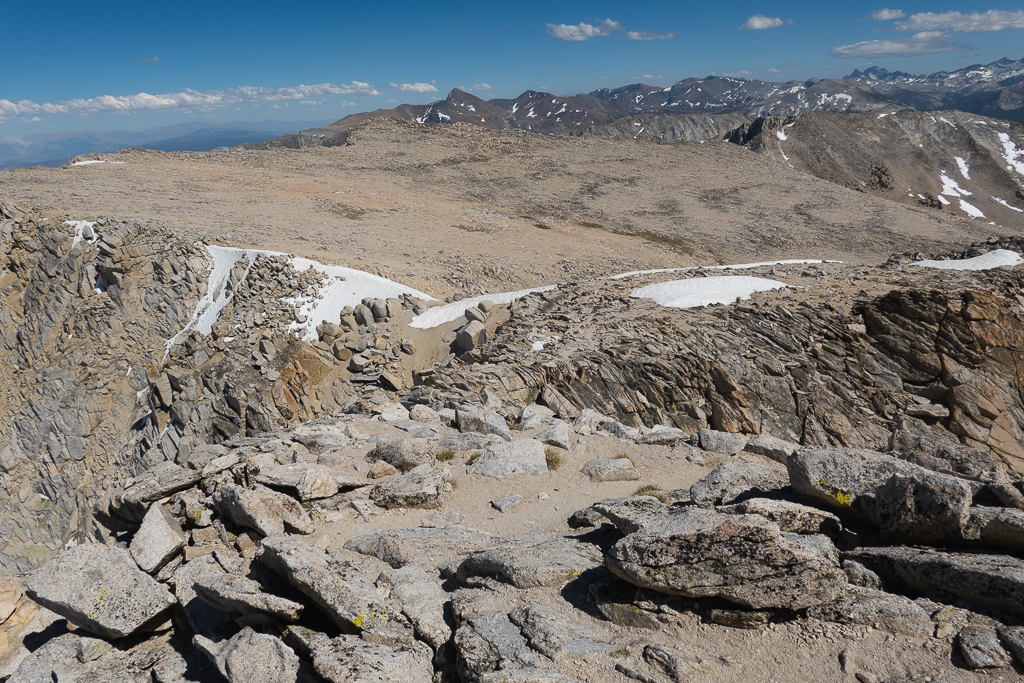
Looking at my map, I planned to follow the ENE ridge back to Saddleback Lake. I followed below this ridge crest on the plateau. When it dropped down, I climbed to the ridge and peeked my head down.
It was a “cliffy” ridge for several hundred feet. Not an easy “scree-ski.” Yeah, no way I’m climbing down that.
Correction: Turns out that this route goes. Just need to find the right spot to enter the ridge. Seems that the route is high on the South Face of the ENE ridge. I was peeking over the other edge where it looked cliffy.
At the same time, I saw that the party climbing the West Ridge wasn’t following me. Instead, they were descending the class 2 scree slopes towards Tuolumne Meadows. Maybe they had a car stashed there, or they were planning to hitch-hike back. Who knows.
I continued on to my next choice — the ESE ridge. When I reached it, I climbed up to the ridge crest and peeked my head down.
This was another series of cliffs, on what appeared to be very loose granite. Yeah, no.
It looked like the next viable choice was the col between Mt. Conness and White Mountain. And then from there, a drainage to the Sawmill campground. I wasn’t sure it would go. From my vantage point, it looked like the entire east side of Conness was cliffed out. I thought I’d check it out, and worst-case scenario, I’d descend to Tuolumne and hitch-hike to my truck.
I started descending, and I picked up footsteps here and there. They seemed to go towards the White Mountain and Mt. Conness col. I became confident.
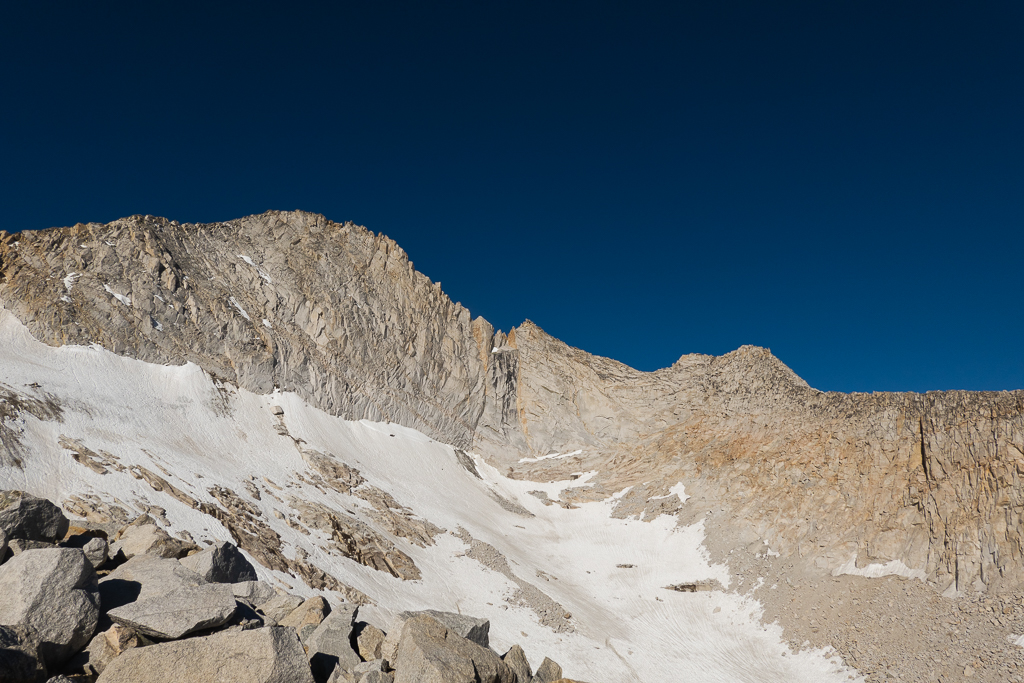
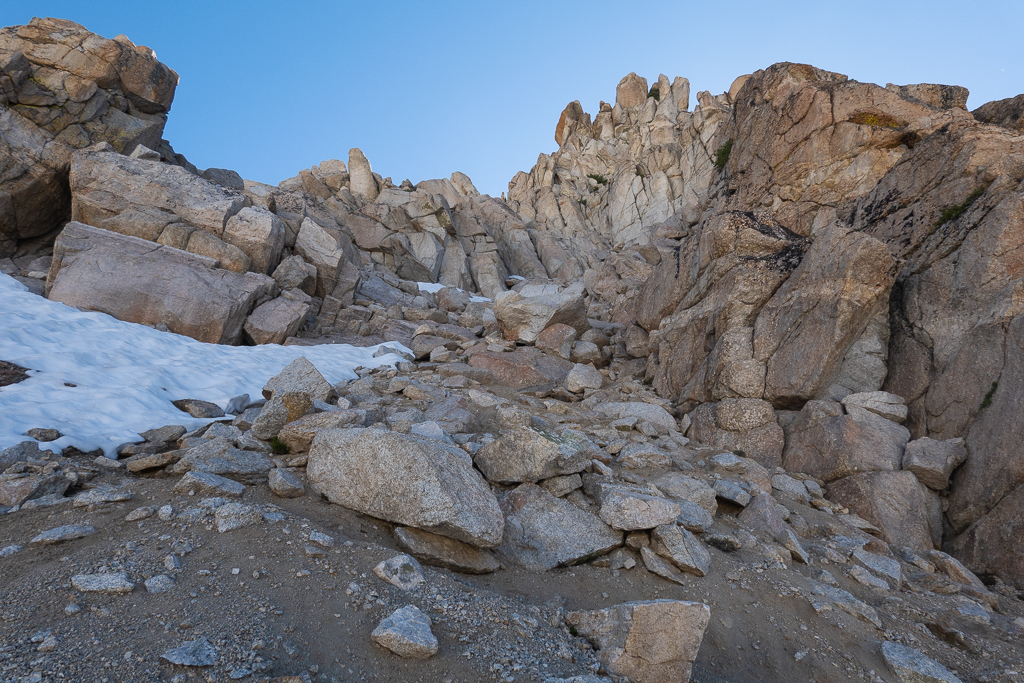
I reached the col. I looked down and saw a miserable boulder field, but no cliffs. It goes!
The boulder field was indeed miserable, with loose blocks atop unstable scree everywhere. It was not scree-skiable in any way, and instead required careful down-scrambling.
After that, I reached a snowfield. There weren’t any footsteps here. Seemed like I was the first climber for some time and the first party down that day.
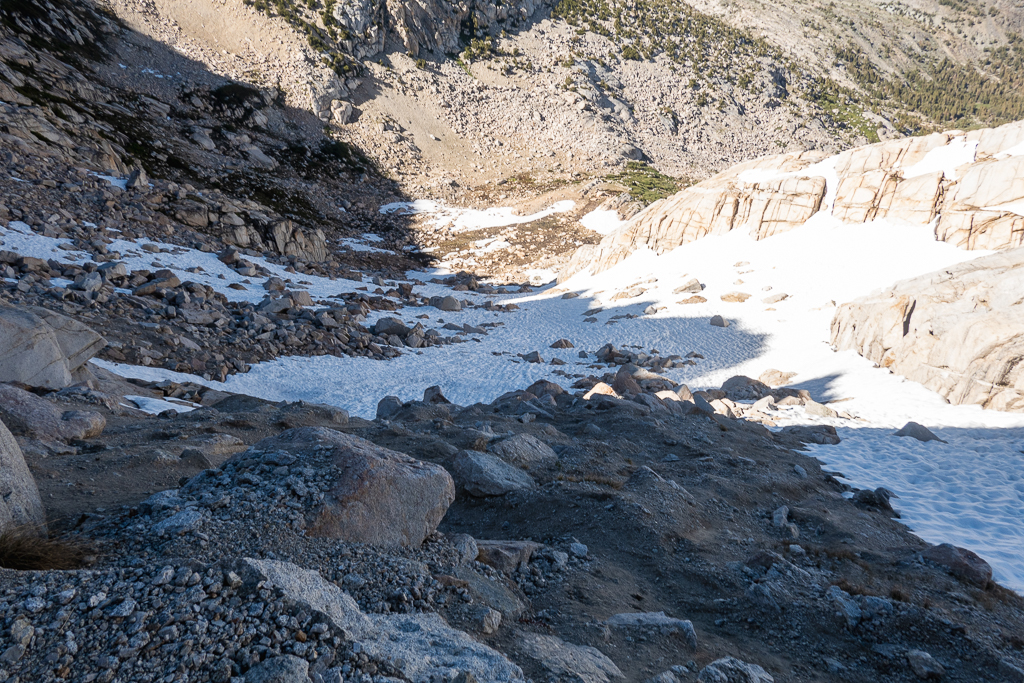
I took a step on the snow and sunk into a waist-deep moat atop a hidden boulder. It took some time to extricate myself. I continued down and probed the rest of the way with my trekking pole. I found more than a few hidden moats, which I managed to avoid. It seems the snowfield is in the annoying transition phase where the snow is sketchy, but there isn’t enough exposed rock to stay on that instead.
By now, I was out of water for several hours. I wasn’t dehydrated since I cameled up, but I was parched. I found a trickle of water coming right from the snow. No chance of disease there. I drank half a liter, then continued.
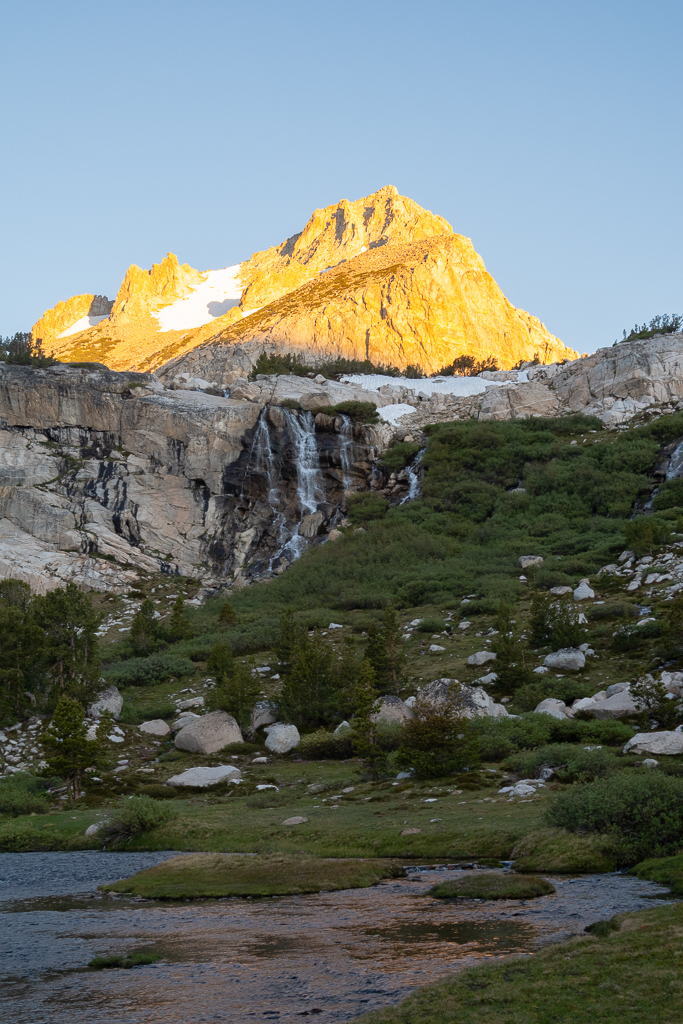
After the snowfields, some easy scrambling and walking on granite brought me to some creeks and waterfalls. After that, a mix of granite, grass, and mud brought me to what my map marked as a trail. I was about 2 miles as the crow flies from the Sawmill campground.
Over here, the trail was indistinguishable from animal paths and dry creek beds. Or, I may not have been on a trail at all and instead on animal paths the entire time. I did have a GPS, but after seeing this section, I assumed the entire route was another “use trail” and I’d have better luck going cross-country in a straight line.
I continued cross-country for a while. There were more than a few creek crossings, muddy areas, and scrambling. I got tired of this and decided to check the trail out. The trail traverses a hundred or two hundred feet above the drainage, rather than following it directly.
I ascended to it, and found a perfect, maintained trail! Well, I wasted a bunch of my time, but now I was home free. I put in my earbuds, blasted music, and hiked back to my truck. A mile-and-a-half of trail brought me to the Sawmill campground. From there, it was about 1.5 – 2 miles of uphill road-walking to my truck. Annoying way to end the day, but oh well.
The two cars from the other two parties were still in the lot. The first one was behind me since they were simul-climbing. I wonder what they’ll think of the descent. The party I saw going to Tuolumne Meadows was still there as well. Perhaps they couldn’t hitch-hike, or they were doing another objective as well.
To end the day, I drove down to the Mobil and devoured a chili cheeseburger and a cheesecake. I had eaten no more than 1,000 calories all day, and I had to make up for that. What I expected to be an easy half-day was in fact, not. Maybe it would’ve been if I hadn’t “winged” the approach and descent.
All in all, it was an awesome day on very cool granite. The climb wasn’t in the best style because I rappelled a few difficult sections near the ridge crest. But, I maintained a good margin of error the whole way, and it was a smooth solo.
To make up for the lack of beta I used, I’ve sprayed all my beta below. But hey, that made for a much better adventure, so “winging it” might not be the worst idea…
Beta
For the approach, first, climb up to the South Ridge of White Mountain — 11,700 to 11,800. feet of elevation — and then follow the ridge-line. It also seems like you could hold a long traverse to the 11,500 feet col. I did a mix of in-between. If there were recent climbers, it would be easiest to just follow in their footsteps rather than blunder through the scree.
Sticking close to the ridge crest after the second tower is the most interesting climbing. But, it’s harder than 5.easy in some sections. If staying here, the crux of the climbing is in the last 150 feet to the summit. If protected it’s cruiser, but it was more than I expected and as a solo, I didn’t want to free it, hence my rappels.
If wanting to keep it 4th-class with a sprinkle of 5.easy, traversing low to meet the West Ridge would be the best way. You would have to stay low the whole way though. There’s no good way to descend low once you’re within 150 feet of the summit. If in-between solo abilities, I think it’s more fun to do the climb protected on the ridge crest rather than as a solo far down low. The exposure to the glacier is magnificent and not worth missing out on.
Also, it’s a huge ridge-line with a huge face. There are dozens of possible routes and variations to keep it as hard or easy as you want. But generally, close to ridge = harder, far from ridge = easier. Towards the end, it’s hard to escape from near the ridge-line and you have to follow it through whatever climbing is in the way.
Rock is great the whole way. Some of it looks like precariously stacked granite, but it’s rock-solid. As good as rock can get.
Protection is everywhere. No need for too many cams or nuts. It’s easy to sling blocks or constrictions. Otherwise, cams from #0.5 to #2 seem the most useful. There would be a ton of rope drag involved in pitching out or even simul-climbing it. Looking at mountainproject, when protecting, it’s common to do one or two pitches near the summit and solo the rest. Which makes sense, that’s where the harder climbing is. Seems like a good balance of efficiency and risk to keep it at those two pitches, if not soloing.
For the descent route via the Conness and White Mountain Col, stay on the North end of the drainage a couple of hundred feet above the river to meet the trail. Don’t follow near the drainage center where the topography wants to take you. It goes, but it’ll take longer since it’s cross-country with lots of water crossings and vegetation. It also seems like the ENE ridge descent goes as well. It just needs to be entered in the right spot.